Creating your first extension spring
This tutorial will run you through the stages of designing an example extension spring.
Start off by creating a new extension spring design:
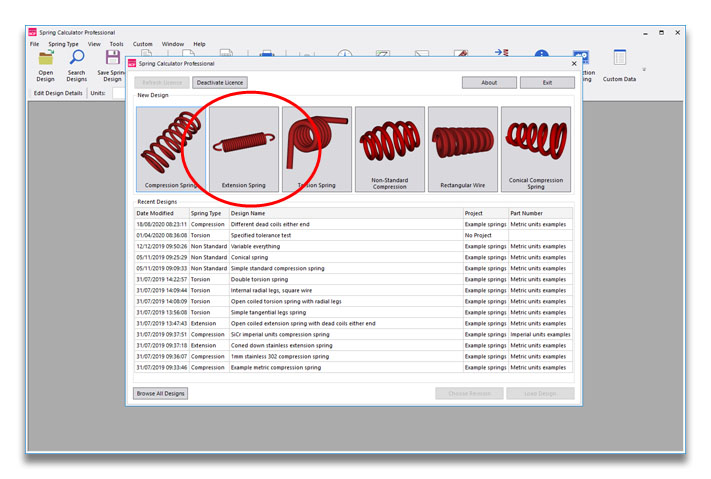
Before doing anything else, check the units, design standard and tolerance standard that are selected. These default to Metric, EN 13906-2 and DIN 2097 (at the time of writing, there is no EN tolerance standard for extension springs). If you need to create your own units to match a drawing, you can do this via Tools > Options.

Then we work down the left hand side, starting with the Required Data section which deals with the basic inputs that you probably know before starting a design, such as material and end loop type. (Sometimes the material choice will change when you look at the design outputs, but generally you will have a pretty good idea where to start.) You can leave these as they are for now.
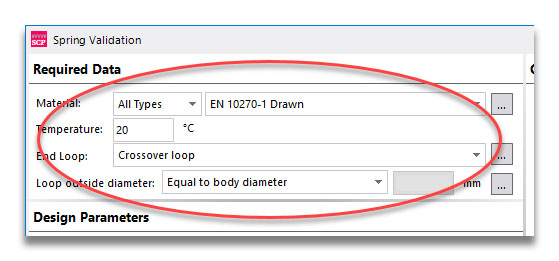
Then we come to the Design Parameters region. This is where the basic shape of the spring is entered. We’ll start by leaving the dropdown design option at the top to “Set Initial Tension, Free Length + 3 Other Parameters”.
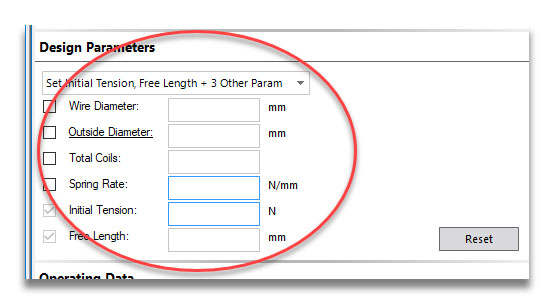
You can see there are 6 parameters, which together define the spring. Down the left is a column of tickboxes; these tell us which values are specified. You can see that the Initial Tension and Free Length variables are already ticked. This is because the other four variables are related, but the initial tension and free length of the spring is independent, so we must specify them.
Click into the value input box next to Wire Diameter and type 3. As you do this, the tickbox is automatically checked to show that we have specified this variable.
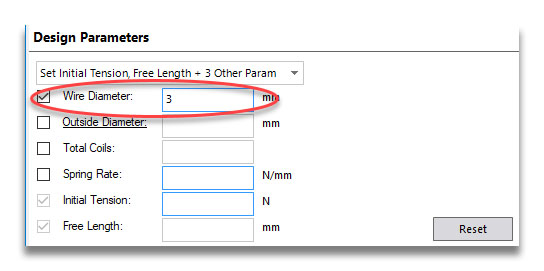
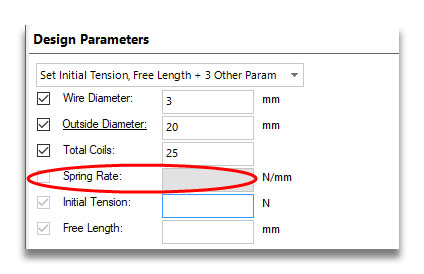
Press Enter to move down to the outside diameter box. Enter 20 for this (you could also specify an inside or mean coil diameter by clicking on the underlined label Outside Diameter) and then 25 for the total coils. At this point the spring rate box becomes greyed out and you can’t edit it, and the same with the tickbox next to it. This shows that the rate will be the calculated variable.
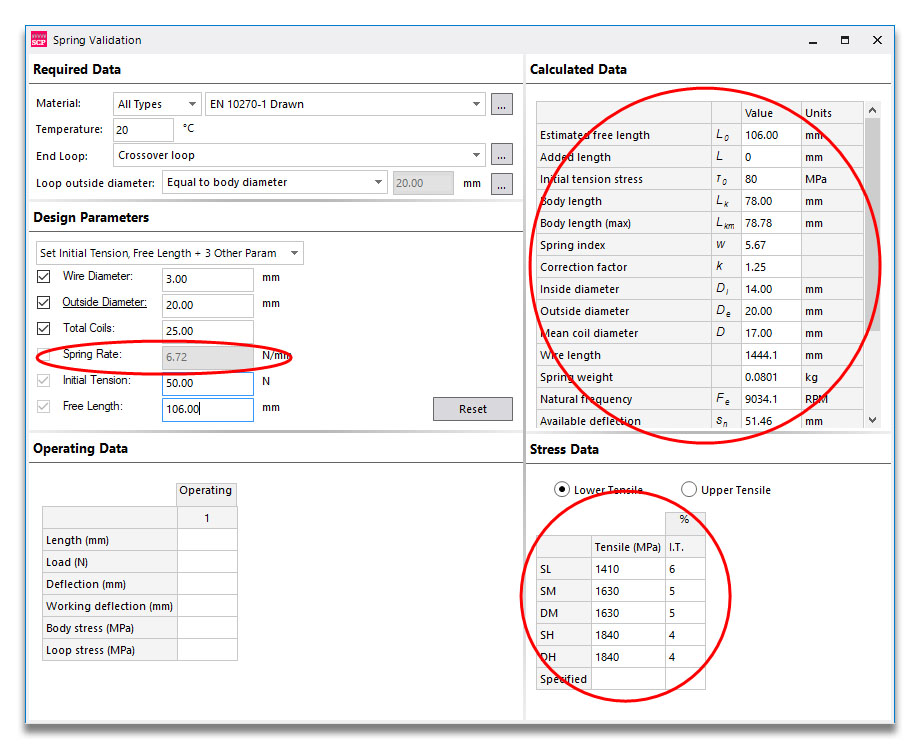
Type in 50 for the initial tension and 106 for the free length (and press Enter) and lots of numbers will appear all over the screen. This is because we now have enough information to calculate our spring. We haven’t entered any operating data (how the spring is being used), but there’s still plenty of information.
First all all, you can see the spring rate of 6.72 N/mm. Then on the right hand side we have the Calculated Data and Stress Data areas. The Calculated Data is general information about the spring in its free position. You can fully customise what is shown in this grid from Tools > Options > Calculated Data.
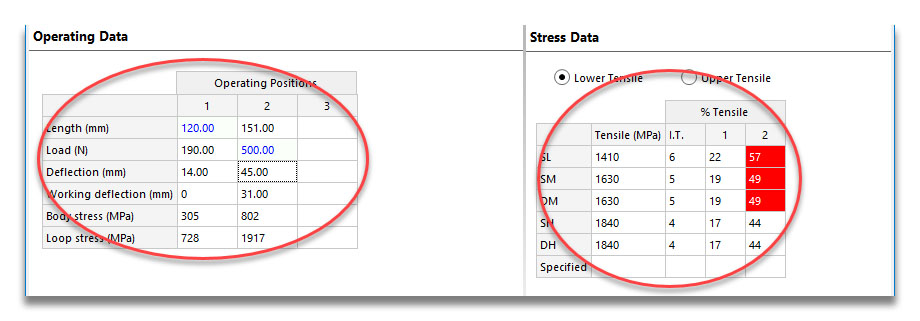
If we look in the Stress Data grid, we can see there are 5 grades to the chosen material (EN 10270-1 drawn carbon steel), which are SL, SM, DM, SH and DH. Some materials will have a single grade (e.g. ASTM A228), some several. The tensile strength of each one is shown next to the name. The last column is the initial tension stress, as a percentage of tensile strength. So as the strength increases, the % Tensile value reduces.
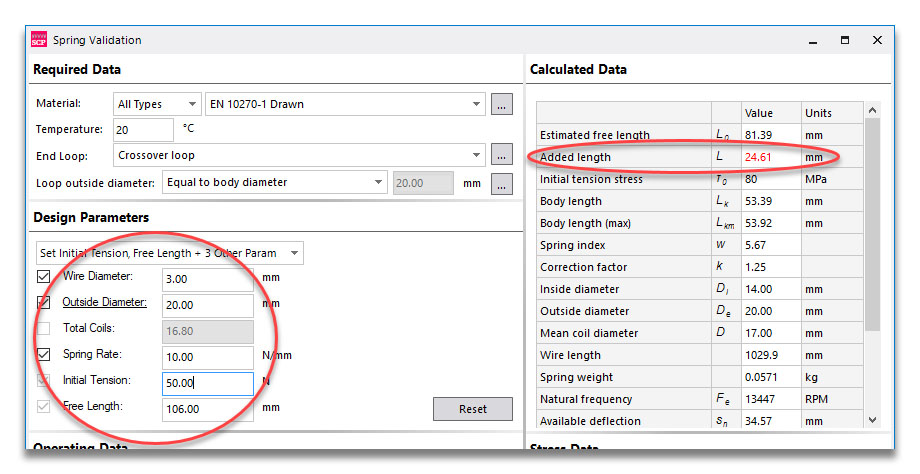
Let’s go back to the Design Parameters and adjust our design slightly. If you uncheck the tickbox next to Total Coils, this becomes the calculated variable and we can now specify the spring rate. Change the value from 6.72 to 10 and you can see the number of coils reduces from 25 to 16.8.
You might also notice that one of the variables in the Calculated Data grid is now in red – the Added Length value. This is because in the first design, the free length matched up perfectly with the number of coils and the length of the loops. Now that we’ve reduced the number of coils, we have to insert some added length (a straight length of wire) to keep the free length the same. It’s not particularly a problem, but you might want to know about it, which is why it’s in red.
Now let’s enter some operating data. Click in the column headed 1 next to the Length label and type 120 (then press Enter). This calculates various parameters for a working length of L1 = 120 mm, and also creates a blank column for position 2. Enter 500 in this column in the Load row, for F2 = 500 N. You could also enter a deflection (from the free position) or a working deflection (relative to L1).
This also populates the Stress Data grid, one of the most important outputs. As well as the initial tension stress, we now have % Tensile values for the two working positions (for the DH grade for example, 17% at L1 and 44% at L2).
You’ll also see that for the first three grades, the % Tensile value is shown with a red background in the L2 column. That’s because the working stress limit in EN 13906-2 is 45% of tensile, and for these three grades, the value is above this. For SH and DH, the wire is stronger so it’s below 45%.
